Many times while working on your Windows device, you might have suddenly faced a slow system, and your applications might not launch. There could be many reasons for this, but high memory usage is one of the most common.
In this post, we will know what high memory usage is, discover the reasons for it, and top ways to fix the high memory usage to optimize your system.
To fix various Windows 10/11 problems, we recommend Outbyte PC Repair:
This software will repair common computer errors, protect you from file loss, malware damage, hardware failure, and optimise your computer for peak performance. In three simple steps, you can resolve PC issues and remove virus damage:
- Download Outbyte PC Repair Software
- Click Start Scan to detect Windows 10/11 issues that may be causing PC issues.
- Click Repair All to fix issues with your computer's security and performance.
This month, Outbyte has been downloaded by 23,167 readers.
What is High Memory Usage?
High memory usage is a state in Windows operating system where the computer’s RAM, ROM, or Cache memory usage grows to such an extent that the system cannot load any other program or process. The error is generally related to RAM and virtual memory.
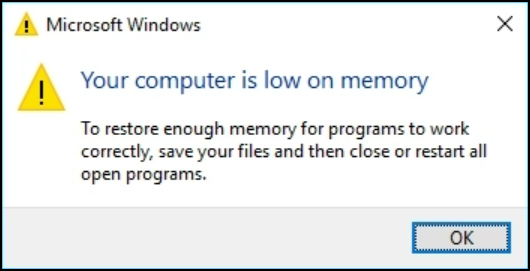
When the system experience high memory usage, you will get the following error:
Running out of system memory can be really frustrating, especially when you have to urgently run a program for your work. Apart from that, a stuttering or sluggish system can ruin your experience.
To check the memory usage on your Windows system, launch the Windows Task Manager and observe the memory percentage under the Processes tab.

If it is more than 70%, you might experience a high memory usage problem.
What are the causes of the High Memory Usage error?
There could be many reasons for high memory usage on Windows 10 and 11. Here are some common ones:
- When you open multiple big applications simultaneously on a system with a low RAM
- If there are too many programs on the windows startup, it can cause high memory usage on the windows boot.
- Opening too many tabs on a browser might also cause ‘low on memory’ error.
- While installing a large program, your system might experience lag because of high memory usage by the installer.
- Low system hardware configuration such as inadequate RAM, insufficient hard disk space, the old-gen processor can also lead to a low memory error.
- A malware attack is one of the common reasons for high memory usage. The malicious program hides in the background and silently uses the RAM to cause memory shortage for other programs.
- Unnecessary files occupying the disk space
What are the signs of High Memory Usage?
When your system experience high memory usage, it will show the following signs:
- A pop-up displaying “Your computer is low on memory.”
- Windows will be sluggish, and the program will take much more time to launch. Some programs might not even launch.
- Your browsing experience might be affected despite the fact that your internet is fast.
- Standard functions like copy and paste will take too much time to complete.
- Some of the running programs might become unresponsive
- Your system startup will be delayed.
How to fix High Memory Usage?
High memory usage can be really frustrating if not solved quickly. Luckily there are pretty straightforward ways to solve this problem. You don’t require much technical knowledge to apply these steps.
Here are the top ways to fix high memory usage on Windows PC.
Close the Unnecessary Applications
While working, you generally tend to open several applications and forget to close them properly. These applications remain active in the background and keep consuming the RAM. So when you open a program on which you wanna work, the system will show a “low on memory” error.
It is best to close the unrequired applications and processes to fix this problem. Here is how to do that:
Launch Windows Task Manager.
Under the Processes tab, look for the applications and processes that are unnecessarily running in the background.
Right-click on them one by one and select End task.

Disable Startup Apps
When you install new applications on your system, some of them secretly gain permission to run on startup. Such applications might unnecessarily consume system resources at the startup even if you don’t want to use them.
That is one of the leading causes of high memory usage right from the system startup. The apps tend to slow down the boot-up process. So, once you disable all the unnecessary apps, the performance will improve.
To disable the startup Apps on Windows 11, follow these steps:
- Right-click on the Start button and select Task Manager from the context menu.

- On the Task Manager window, switch to the Startup tab and check the list of startup programs.

- Select the program you want to disallow on system startup and click the Disable button at the bottom.

- Disable all the unnecessary programs on the system startup by following the above steps.
Disable Background Apps
On your Windows 11 device, there are many applications and processes that require running in the background for the system’s proper functioning. However, in the midst of essential applications, some useless apps also gain the right to run in the background. Such apps unnecessarily use the system resources and might contribute to the high memory usage. Luckily, we can disable such apps.
To disable the background apps on Windows 11, follow these steps:
- Open Start Menu and select Settings.
- From the left pane, click on Apps, and choose Apps & features.
- Now you have to check every application if it is permitted to run in the background.
- Click on the three vertical dots select Advanced options.

- Scroll down, and you will see the Background app permissions section.

- From the drop-down menu, choose the preferred background permission you like to provide to the application.

Clean Up Your Hard Disk
Usually, older PC tends to get filled with lots of useless data that unnecessarily lodge valuable space. These can be a headache as they cause a considerable amount of performance degradation in your system. That’s why you need to get rid of them.
You can run Disk Cleanup to free up disk space on your system, and for that, you need to perform these steps:
- On your Windows 11 system, search for File Explorer and click on its icon to launch it.

- Navigate to This PC tab from the left pane and choose the drive that you want to clean.
- Right-click on the selected drive and choose Properties.
- Select the category of files you wish to delete and click OK to remove them.

Delete Temporary Files
Temporary files unnecessary get accumulated in the system and take up valuable space. Such files might indirectly cause the system to slow down.
On Windows 11, it is easy to remove Temporary files. Here are the steps:
- Open Windows 11 Settings from the Start Menu.
- From the left pane, choose System settings and click on Storage from the right.
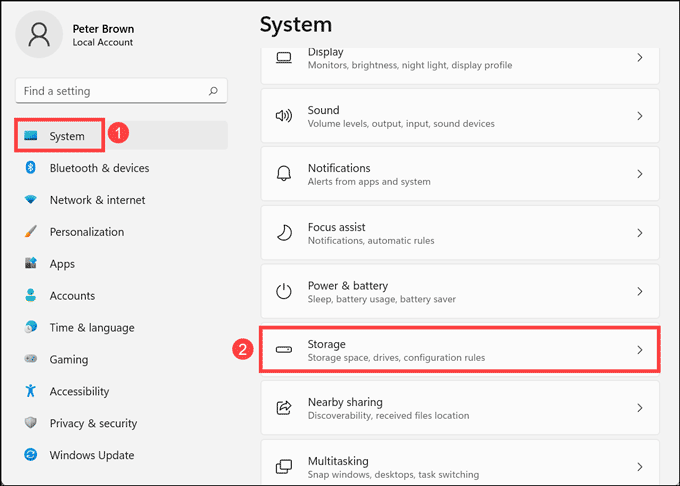
- Click on the Temporary files option.

- Tick all the boxes that you want to delete and click on Remove files.

Defragment Hard Disk
If you are using the HDD on your system, it tends to get fragmented with time and highly slow down the tasks like copy & paste, search, and more. So, they need to be defragmented periodically. This does not happen in SSDs, so they are not supposed to be defragmented.
Here are the steps to defrag your HDDs on Windows 11:
- Launch Windows 11 File Explorer from the Start Menu.
- Navigate to This PC tab from the left pane and choose the drive that you want to defrag.
- Right-click and select Properties.
- Switch to the Tools tab, and under Optimize and defragment, click on Optimize.

- On the Optimize Drives window, select the drive you want to defrag and click on the Optimize button.

Uninstall Unessential Applications
There are many instances when you might have to install some applications for completing specific tasks. Most users tend to forget to uninstall such applications after using them. Such applications get accumulated in the system without any use. They would just take up memory spaces unnecessarily and make other apps run slower. The same goes for the unnecessary in-built Microsoft applications difficult to uninstall. To avoid low memory problems, it is better to uninstall the unessential applications.
To uninstall such applications on Windows 11, here is what you need to do:
- Click on the Start button and select Settings from the Windows 11 Start Menu.

- From the left pane, click on Apps, and then select Apps & Features from the right pane.

- You will see the list of all the installed apps. Click on the three vertical dots next to the app you want to remove and select Uninstall from the menu.

- On the next prompt, click on Uninstall. The application will be uninstalled.

Increase Virtual Memory
On Windows 10, virtual memory, also known as paging file, is an essential component designed to remove and temporarily store less frequently use modified pages allocated in RAM (random-access memory) to the hard drive. Increasing the virtual memory can fix the high memory usage problem.
For that follow these steps:
- Press Windows key+ R and run sysdm.cpl

- The System Properties dialog box will pop open.
- Click on the Advanced tab and then on the Settings Button found under the Performance section.

- On the Performance Options window on the Advanced tab, click on the Change button found under Virtual Memory section.

- The virtual memory window will open. uncheck the ‘Automatically Manage paging file size for all drive’ option.

- Then select system drive and then click on the Custom Size option button and enter the desired size on the Initial Size and Maximum Size input buttons (your entries should be in MB). Make sure the No Paging Option is not selected.
- Once satisfied with your entries, click on the OK button and the Apply button.
Run System File Check
SFC scan is a command-line tool that scans your system for any errors and glitches and automatic repair them. If you are still struggling with high memory usage, you can try the SFC scan.
Here are the steps for that.
- From the Windows search bar, search and launch the Command Prompt with the administrator rights.

- Type this command and hit the Enter key: sfc/scannow.

- The scanning would start, and it would take some time to complete depending on your system configuration.
- After the scan, if it found any problem, the solution would be automatically applied.
- Close the Command Prompt window and restart your system.
Run Antimalware Scan
A malware attack could also be the reason for the high memory usage. It might have entered into your system, corrupted many files, and disabled many functions.
If your system is not equipped with antimalware, it is recommended to get a robust security solution like MalwareFox and perform a full system scan.

Summing Up
If your system is running low on memory, these are all the possible solutions to fix the problem. Even after trying all these fixes, if your system is sluggish, maybe the apps you are using demand higher RAM. In that case, it is best to upgrade your system RAM and, if possible hard drive and processor too.
The available RAM on your system is low because modern programs require more amount of RAM and other resources to run properly. If your system RAM is already in-built low and you run any heavy program, the RAM available to run any other program would be pretty less.
Peter is an Electrical Engineer whose primary interest is tinkering with his computer. He is passionate about Windows 10 Platform and enjoys writing tips and tutorials about it.
