Windows key on the keyboard is one of the most useful keys for Windows 10 and even for previous versions of Windows. It directly launches the Windows Start Menu and thus eliminates the use of a mouse, which may result in productivity enhancement. It also acts as a supporting key to perform many keyboard shortcuts.
However, while playing games or during any other activity, the Windows key creates unnecessary keystrokes, which may affect your gaming performance.
To fix various Windows 10/11 problems, we recommend Outbyte PC Repair:
This software will repair common computer errors, protect you from file loss, malware damage, hardware failure, and optimise your computer for peak performance. In three simple steps, you can resolve PC issues and remove virus damage:
- Download Outbyte PC Repair Software
- Click Start Scan to detect Windows 10/11 issues that may be causing PC issues.
- Click Repair All to fix issues with your computer's security and performance.
This month, Outbyte has been downloaded by 23,167 readers.
If the Windows key is causing any trouble to you for whatever the reasons, here are some methods to disable and enable it. Since Windows does not provide any direct option to disable it, we would use a third-party method, registry tweaks, and Group Policy editing.
Disable Windows Key using AutoHotKey
AutoHotKey is the Windows scripting language that allows users to create scripts to perform complex tasks. Since it is open-source, therefore it is available for free.
Here are steps how to use it to disable Windows Key:
Download AutoHotKey and install it.
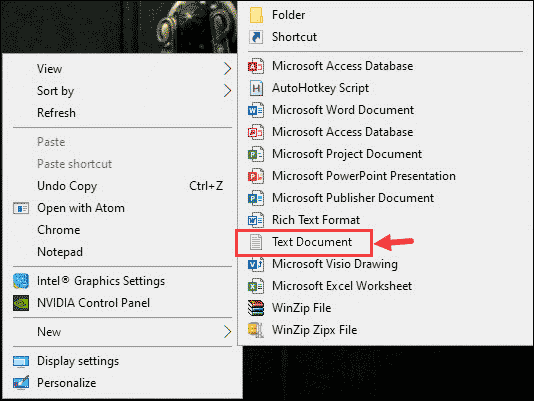
Right-click on the desktop and select New->Text Document and name the file as Disable Win Key.ahk.
Open the file and copy & paste the following code in it:
;; Disable Left Windows Key
LWin::Return
;; Disable Right Windows Key
RWin::Return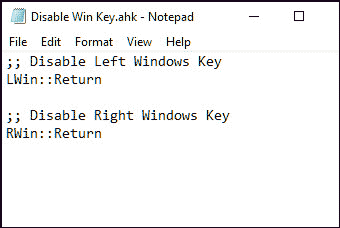
Save the file.You can name it anything; just ensure that the file extension is ‘.ahk’.

Now, double-click the file to run it.
That’s it. As long as the script is running, the Windows Key would be disabled on the keyboard.
To enable the Windows key again, right-click on the AutoHotKey icon in the taskbar and select Exit.

Disable Windows Key using Registry Editor
- Open Run Window, type regedit, and hit the Enter key to open Registry Editor.

- Navigate to the following path: HKEY_CURRENT_USER\Software\Microsoft\Windows\CurrentVersion\Policies\Explorer
- Right-click on the Explorer folder and create a new DWORD(32-bit value).
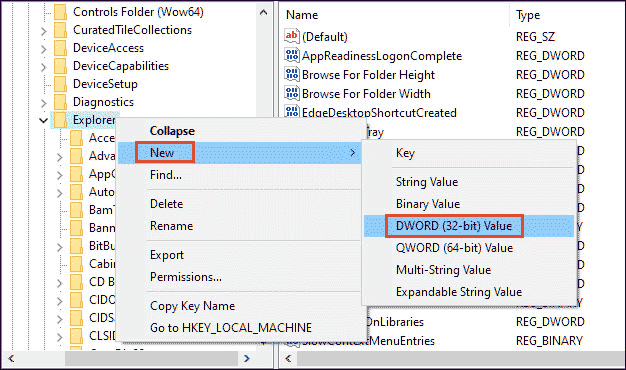
- Name this key NoWinKeys.
- Now double-click on it to modify its Value data. Set it to 1.
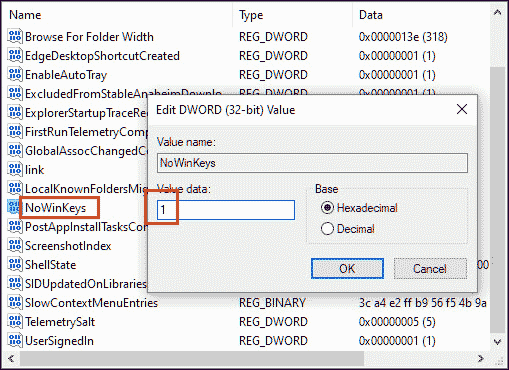
- Close the editor and restart your system. Windows key on the keyboard should have been disabled.
To enable Windows Key, either delete the NoWinKeys or set its value data as 0.
Disable Windows Key using Group Policy Editor
Group Policy Editor is the third method to disable the Windows key on your Windows 10 system. However, this method will not work for Windows 10 Home users, as Group Policy Editor is not available for them.
- Type gpedit in the Run Command window and hit the Enter key.

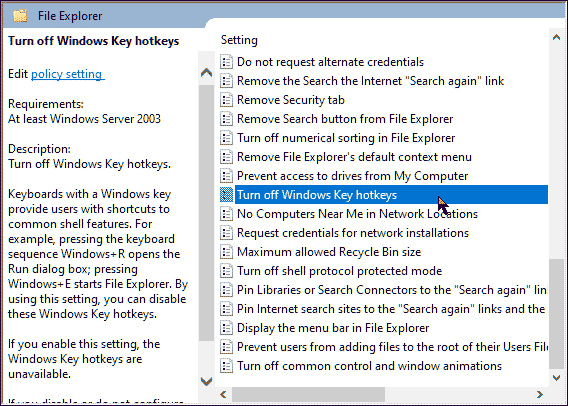
- Navigate to this path: User Configuration → Administrative Templates → Windows Components → File Explorer
- On the right pane search for “Turn off Windows Key hotkeys” policy and double-click on it to edit it.
- Now click on Enabled bullet option and select Apply and OK.
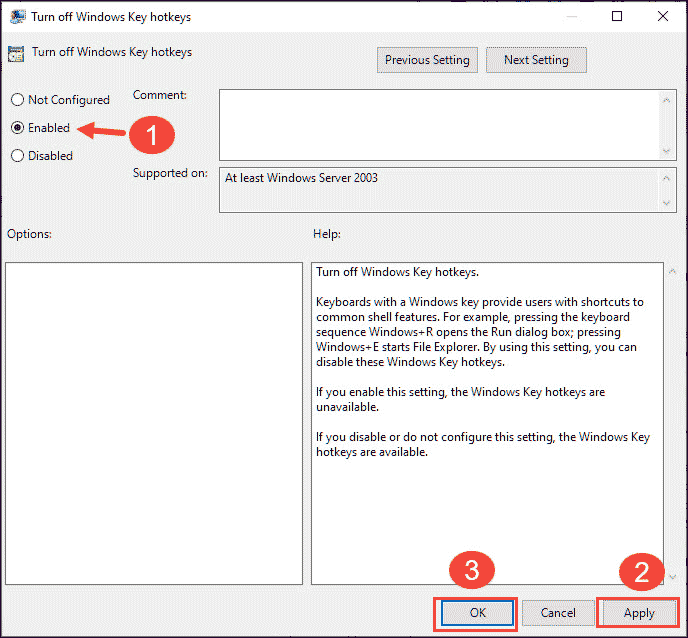
- Close the Group Policy Editor and restart your system.
To enable Windows Key again, go to “Turn off Windows Key hotkeys” and click on the Not configured bullet.
Conclusion
These are the simple methods to disable and enable the Windows key in Windows 10 operating system. Although they are all straightforward and easy to perform, it is recommended to use AutoHotKey for temporary solutions like gaming. It is more manageable and efficient to enable or disable Windows key using it.
YES. AutoHotKey is like .exe files. Generally, it is safe to use, but if you run the script from unknown sources, then your device can be infected with malware, or it can even get hacked.
Unfortunately, there is no direct built-on option to disable the Windows key in Windows 10. However, you can do that by following the simple, straightforward steps of Group Policy Editor and Registry editor explained in this guide.
Peter is an Electrical Engineer whose primary interest is tinkering with his computer. He is passionate about Windows 10 Platform and enjoys writing tips and tutorials about it.