Specific files types, so to say. Windows 10 Anniversary Update comes with a welcome ability to set default locations for specific file types, and manage them from one screen.
You can use this procedure to change which drive you save new documents, music files, photos and video files to, and this can help a lot with management and in keeping things neatly organized on your PC or device.
To fix various Windows 10/11 problems, we recommend Outbyte PC Repair:
This software will repair common computer errors, protect you from file loss, malware damage, hardware failure, and optimise your computer for peak performance. In three simple steps, you can resolve PC issues and remove virus damage:
- Download Outbyte PC Repair Software
- Click Start Scan to detect Windows 10/11 issues that may be causing PC issues.
- Click Repair All to fix issues with your computer's security and performance.
This month, Outbyte has been downloaded by 23,167 readers.
To do this on a Windows 7 or 8.1 machine required a complex procedure that involved defining a custom target location for each Library folder.
In Windows 10, you just have to click an option to set which drive you want to save each type of file to, and this comes very handy if your system uses a fast SSD to hold the operating system, and a larger traditional hard drive to house and store files.
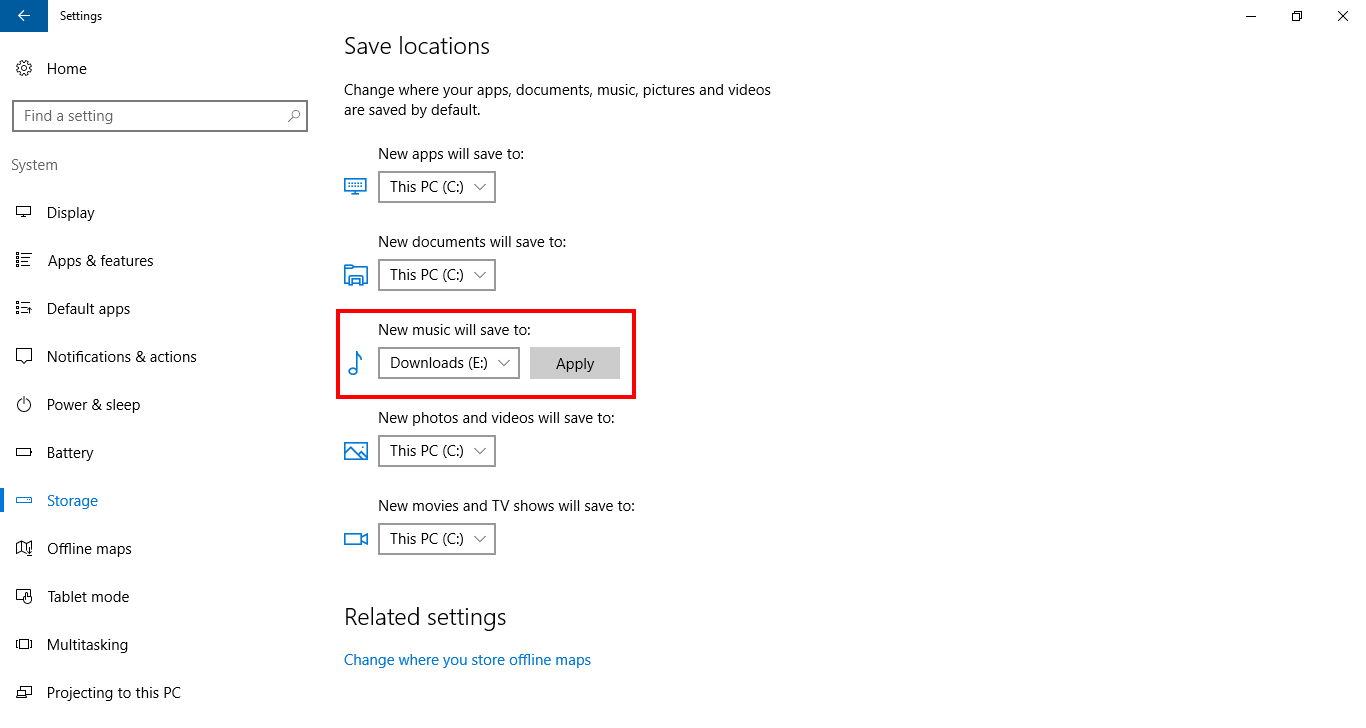
Click Start, go to Settings, and then navigate to Storage.

Scroll down to the Save locations section and use the dropdown menus to select the drive you want for each file type, and then click on Apply.
Do keep in mind that this will not move any existing files to the new location, you will still have to do that manually. But Windows 10 will take care to sort the various types of files you specific into the new location from now on.
